Map Editor


Developer maps in Timberborn are created using an in-game editor. The editor was locked in Demo, but has been unlocked alongside the Early Access. It was also unlocked in the Closed beta.
The editor allows the user to create a custom-shaped map, change the terrain’s shape using different brushes and place resources on the map (including both plants and ruins). The player can also set up water sources with different strengths, add slopes, barriers, and pick a starting location. This increases the users using their own maps to easily play without the strugglement of water, food or logs. We suggest that you go to the Discord Community maps (clicking the link will give you an invite to the channel) for some official-like maps.
The map editor provides a user with the ability to create and/or edit maps.
Map file bar

Map Editor: Map file bar
The map file bar provides a user with access to actions for creating, loading, and saving map files as well as the ability to exit the map editor.
Save
Save, if clicked, will save the current map. If the current map has not yet been named a save map window will appear.
Save as...
Save as... allows the user to choose a name for their map and to save that map.
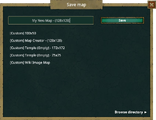
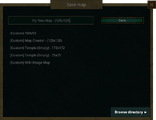
Save map screen
The save map screen as seen in-game.
Map Editor: Save map, name map screen

The text input box is where a user will input a map filename. In the following example picture, a map name of: My New Map - (128x128) has been chosen.
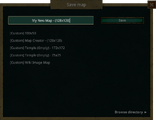
Map Editor: Save map, name map, input name screen

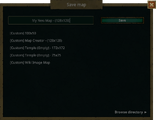
To Save the now named map a user would click the Save button.
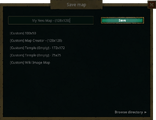
Map Editor: Save map, name map, save map screen

The custom created maps list displays a list of previously saved custom map files. Choosing a map from this list will set the name of the current map to the name of the map selected.
Map Editor: Custom map list

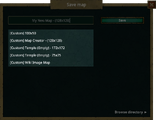
Browse directory, if clicked, will open a folder window that contains Timberborn map files.
Map Editor: Browse directory action

X, if clicked, will exit save map screen and return to previous screen.
Map Editor: Close save map screen

Load
Load, if clicked, opens a new window that displays all Timberborn maps. Selecting a map from the list and then clicking Load will load the selected map for editing.
Clicking X will exit the load map screen and return to the previous screen. Browse directory, if clicked, will open a folder window that contains Timberborn map files.
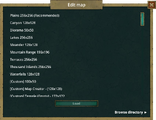
Map Editor: Load map window

New map
New map, if clicked, opens a new window that requires (2) inputs. The minimum accepted number is (4) and the maximum accepted number is (256). Valid map sizes range from (4x4) to (256x256).
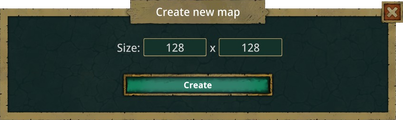
Map Editor: Create new map screen

Maps do not need to be square. Rectangular maps are also a possibility. An odd, but apt example is: (4x256). The size may be odd, but because both numbers are valid the map is valid.
Please note: the largest building is (5) tiles wide by (6) tiles deep and requires a tile in front for pathing. Because of this it is suggested that a maps smallest dimension be at least (10) tiles. The choice is entirely up to the user.
Exit editor
Exit editor, if clicked, will result in a confirmation window appearing. To actually exit the map editor click Yes and the map editor will close and the user will be returned to the main menu.
If a user has found themselves here in error, clicking No will return the user to the map editor.
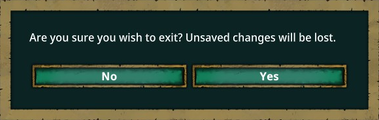
Map Editor: Exit editor confirmation screen

Water simulation bar

| 1 | 2 | 3 | 4 | 5 |
| 6 | ||||
| 7 | ||||
- Water simulation icon (not a button)
- Pause water simulation
- Run water simulation (normal speed)
- Run water simulation (faster speed)
- Reset - resets water simulation by removing all water from map
- Hide water
- Hide natural resources
Tool bar
| 1 | 2 | 3 | 4 | 5 | 6 | 7 | 8 | 9 | 10 | 11 |

Map Editor: Tool bar

Bottom left bar
Notice to add starting point....
Bottom right bar
Version info, bug report button....