Fluids

From Timberborn Wiki
(Redirected from Water (flowing))
Jump to navigation Jump to search
Fluids icon.png


Fluids icon.png Fluids, previously called Flowing Water, refers to the physical water and Badwater present on the map. They are produced by Water Source icon.png Water Sources and Badwater Source icon.png Badwater Sources and transferred using Fluid Dump icon.png Fluid Dumps and Mechanical Fluid Pump icon.png Mechanical Fluid Pumps.

Stream Gauge icon.png Stream Gauges measure depth and flow. Depth is measured in meters (m), and flow is measured in cubic meters per second (cms). As the fluid simulation runs at 0.5x speed, it takes 2 seconds for 1 cms of current to fill one block.

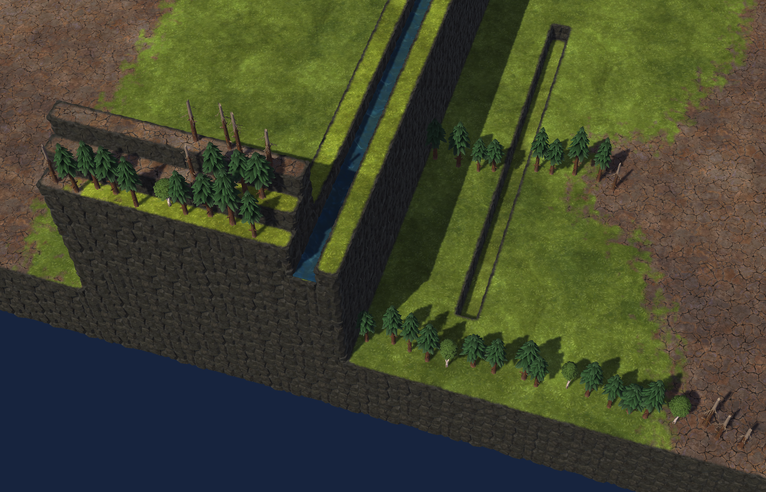
Fluids freely flow to orthogonally adjacent blocks that contain less fluid, and the amount of flow a single tile wide-single deep trench can support around 6.6cms, due to how the fluid simulation works.

When Fluids flow down a step in elevation (waterfall), it gets limited to 2.2cms of flow per waterfall edge. This occurs with double and triple floodgates too (when the height is adjusted over 1).

Flowing fluid can be used to generate Power icon.png power with Water Wheel icon.png Water Wheels, Compact Water Wheel icon.png Compact Water Wheels and Large Water Wheel icon.png Large Water Wheels. As the power generated by a single water wheel is dependent on the current flowing through it, it is often necessary to increase the current by narrowing the fluid's path using structures that restrict flow, such as Levee icon.png Levees and Dam icon.png Dams.

Non-structural Buildings icon.png Buildings become Flooded when in direct contact with fluids, preventing them from functioning (except from Zipline stations and Tubeway stations).


Water

Water, generated by Water Source icon.png Water Sources during Temperate icon.png Temperate seasons, is the main fluid in the game. it is not produced during Drought icon.png droughts, and is replaced by badwater during Badtide icon.png badtides. The transitions between these conditions are gradual, taking a few seconds to fully change.

Water irrigates nearby ground blocks, allowing Crops icon.png Crops and Trees icon.png Trees to grow.

Flowing water can be extracted and purified using Water Pump icon.png Water Pumps, turning it into Water (Good) icon.png Water (Good) to be consumed by Beavers icon.png Beavers, industry, or deposited back into the map using the Water Dump icon.png Water Dump.

Badwater

Badwater, generated by Badwater Source icon.png Badwater Sources (except during Drought icon.png Drought), and by Water Source icon.png Water Sources during Badtide icon.png Badtide, is the second on-map fluid type added to the game.

It has several effects:

  • It pollutes regular water, with effects increasing proportionally with the percentage of Badwater.
  • It reduces irrigation distance
  • It contaminates the nearby land instead when it is over 50% contaminated.
  • It applies negative effect of Contamination on Beavers contact it, severely reducing their Well-Being icon.png Well-Being.

On-map Badwater is extracted using Badwater Pump icon.png Badwater Pumps and the Badwater Rig icon.png Badwater Rig, producing the Badwater (Good) icon.png Badwater (Good) used in the production of Extract icon.png Extract and Explosive icon.png Explosives.

Mechanical Fluid Pumps also isolate Badwater and water from polluted water.

Storage

Fluids can be stored as Water (Good) icon.png Water (Good) or Badwater (Good) icon.png Badwater (Good) in Large Tank icon.png Tanks, or in their fluid states in reservoirs on the map, using natural terrain and landscaping tools.

1 block of water will provide 5 units of drinkable water, and each beaver will need 2-3 units per day. As tanks prevent evaporation and can store water in a much smaller volume, it is generally a good idea to use tanks to store water where possible. However, depending on the terrain, it can be significantly cheaper to store much larger quantities of water in physical reservoirs.

Type Capacity Size (№ of blocks) Equivalent Volume of Reservoir
Small Tank icon.png Small Tank 30 2 6
Medium Tank icon.png Medium Tank 300 12 60
Large Tank icon.png Large Tank 1200 27 240

Adjacency

Example of how a fluid block used to calculate its adjacency score
In the above example (far left), the centre block checks the eight blocks surrounding it, and gives itself a temporary score of four, as it has four adjacent fluid blocks. It then works out the score of the block to the north (ignoring its own block this time), which gives a score of three. The block to the east gives a score of two, and the block to the south gives a five. It does not check the block to the west, as it is not a fluid block. As the highest score from these checked blocks is five, it gives itself a score of 5.

In prior versions, to calculate a fluid's #Evaporation rate, as well as water's #Irrigation distance, each block of fluid is given a score based on how many adjacent blocks of fluid it has (orthogonally and diagonally), from 0 to 8.

If an orthogonally adjacent block's score would be greater (excluding the point that would be gained from the original block), that score is used instead. This is only checked if the adjacent block contains fluid.

This extra check was likely done so reservoirs with irregular edges irrigated to the same distance and evaporated as reservoirs with straight edges. It does not seem to be the case in version 0.6.9 and higher.

Evaporation

Every block of fluid evaporates over time, proportionately to the amount of surrounding fluid. This uses the first part of the adjacency score as described above (it does not check its neighbors... that's for irrigation).

The depth of the fluid does not influence the evaporation rate, but if multiple blocks of fluid that are not vertically connected exist within a single column, they are counted separately.

The values listed below are approximate (as of Update 6), based on testing around this reddit comment and subsequent reply.

Adjacency Score Evaporation per day (cubic metres)
0 0.30
1 0.25
2 0.20
3 0.16
4 0.12
5 0.09
6 0.07
7 0.06
8 0.04

The change in height of a body of fluid due to evaporation is the average loss in volume of each block within it. A 3x3 pool, for example, would have four corners each with a score of 4, four edges with a score of 7, and the centre block with a score of eight. The total loss of water would be 4×0.12 + 4×0.06 + 1×0.05 = 0.77 cubic metres per day. This means the pool drops by approximately 0.77÷9 = 0.09 metres per day.

Fully sealed pipes still experience evaporation.

For reservoirs of size at least 3x3, a larger reservoir loses volume faster, but loses depth more slowly, up to a point.

Channels/canals with a width of at least three blocks act in the same way, but channels of width 1 & 2 lose a greater volume of water, as well as depth.

Channel Width Evaporation per day, per 1-block length cross-section (cubic metres) Surface level drop per day (metres)
1 0.20 0.20
2 0.18 0.09
3 0.22 0.073
4 0.26 0.065
5+ 0.18 + 0.04 * (N - 2) 0.1 / N + 0.04

Irrigation

A demonstration of how elevation changes affect irrigation distance.
Each 1-block increase in elevation reduces the irrigation range by six blocks, regardless of where the increase is. Decreases in elevation do not affect it.

So long as a body of water is below 50% pollution, it irrigates nearby ground blocks, allowing Crops icon.png Crops and Trees icon.png Trees to be planted and grow. Irrigation increases to its maximum range at 0% pollution (pure water).

The distance irrigation can travel is based on the source water block's adjacency score, and it travels direct (meaning a block of water irrigates a circle shape around it, rather than a diamond). However, a block does not need direct line of sight of the water to become irrigated, so long as an indirect path can be taken to reach it.

Each increase in elevation reduces the irrigation distance by six blocks, regardless of how close the step up is to the water. Decreases in elevation do not affect the irrigation distance.

Adjacency score Uncontaminated irrigation distance
0 2
1 4
2 6
3 8
4 10
5 12
6 14
7 16
8 18

This means that a 3x3 square irrigates 18 blocks distance counting the middle block as one, or 16 blocks from the first land block.

Soil Contamination

If a body of water is above 50% pollution, it contaminates nearby ground blocks, killing plants growing there. This ground contamination lasts for a brief period after pollution levels drop.

Contamination is not affected by adjacency, instead reaching a maximum distance of seven blocks at 100% pollution (pure Bad Water), regardless of size of the source. Any step up in elevation decreases the distance by five blocks, and like with irrigation, steps down in elevation do not affect the distance.

Fluid Pressure

It is possible to increase the amount of fluid in a single block beyond 1 cubic metre (and drastically increase flow rates with it) within Update 6's fluid simulation. This can be done either by fully encapsulating a fluid source, or by having a waterfall/water column feed into a canal that has an impermeable block (e.g. a Levee icon.png Levee or Impermeable Floor icon.png Impermeable Floor) over it. Pressured pipes can be used to lift fluids upwards.

Pipes are the only way to exceed the 6.6cms flow limit, there is no flow limit when a pipe is created. Be careful as the 2.2cms waterfall limit can still occur in pipes

You can use enclosed boxed to seal Water/Badwater sources non-offically, the box will build up pressure over time, it won't brust though.

Strategy

With the changes to the fluid simulation brought by Update 6, a lot of strategies in managing fluids have changed drastically.

Storage

As Large Tank icon.png Tanks contain significantly more fluid than their respective volume of reservoir and do not allow evaporation, this is the most efficient way to store fluids. However, to store much larger volumes, reservoirs may cost significantly less materials to construct depending on the terrain, and do not require Workers icon.png Workers to function. Reservoirs can also be used to provide Power icon.png Power to Water Wheel icon.png Water Wheels during Drought icon.png Droughts and Badtide icon.png Badtides, made much easier with the addition of Sluice icon.png Sluices.

Although the shape of a reservoir does has some influence over evaporation rates - with extremely narrow reservoirs evaporating faster - the additional steps when calculating a block's Adjacency score mean a reservoir with irregular edges does not have a significantly faster evaporation rate than one with perfectly straight edges, so natural reservoirs do not need to be reshaped to be viable.

Channels

As described in the Evaporation section, channels of width 1 & 2 evaporate a greater volume of fluid than wider ones. For managing fluids upstream of a reservoir, the best option is most often the use of canals of width 3, or natural rivers wider than that. Practically speaking however, so long as a reservoir's full depth can be maintained by the inflow, the only change an upstream channel's evaporation rate would make would be to the rate at which the reservoir refills after a drought or badtide.

For most purposes downstream of reservoirs, the evaporation rate doesn't matter, meaning 1-wide channels are still a viable option if construction cost is a concern.

With the changes brought by Update 6, more options have become available when transporting fluid between high places:

Canals

Prior to update 6, the only practical way to transport fluids between high places was to build a canal from the ground that reaches their respective heights. This is still a viable option, especially when their heights are relatively low and the supply of Metal Block icon.png Metal Blocks and Plank icon.png Planks is limited, but it does prevent a large portion of the ground from being used, and can make it inconvenient to route Path icon.png Paths around or over them. Ground-level canals are also viable when there are minimal changes in elevation between bodies of fluid.

Aqueducts

With Update 6, fluids no longer require a solid connection to the ground, meaning aqueducts are possible. The two main ways of building aqueducts are with Platform icon.png Wooden Platforms, or with Overhang 2x1 icon.png Overhangs, using Levee icon.png Levees and Impermeable Floor icon.png Impermeable Floors to hold the fluid.

Although Platform icon.png Wooden Platforms do not require metal to build and use fewer materials overall when built at a low elevation, using them would require a lot more individual buildings, resulting in a significantly longer construction time, and taller aqueducts would need more materials overall. Also, although they do allow paths and certain buildings like Medical Bed icon.png Medical Beds to be built beneath them, larger buildings, as well as Trees icon.png Trees, Blueberry (Bush) icon.png Bushes and Crops icon.png Crops, are not able to be built or grow there.

Using Overhang 2x1 icon.png Overhangs cuts down on the footprint significantly, allowing space for large buildings and plants (given a tall enough aqueduct), and is much quicker to build, although they do need metal.

A 1 wide 1 deep aqueduct itself can be built with either 5 Levee icon.png Levees, or 2 Levee icon.png Levees and 1 Impermeable Floor icon.png Impermeable Floor. The former requires more Log icon.png Logs and is taller, but does not require metal. The latter is significantly cheaper in materials and is shorter, but needs metal to be built.

Underground Pipes

As the fluid system follows the laws of Communicating Vessels, it is possible to build underground pipes, using Dynamites icon.png Dynamites to create a channel, followed by Platform icon.png Wooden Platforms or Overhang 2x1 icon.png Overhangs with Levee icon.png Levees or Impermeable Floor icon.png Impermeable Floors atop them to close off the pipe, and with vertical shafts built from Levee icon.png levees for the inlet and outlet. Although this will result in non-Terrain Block icon.png Terrain Blocks at the ground's surface preventing plants from being grown there, it has no overground structure, so buildings can be build without restriction above it.

Cost of 1-wide channels
Channel Type Buildings required per 1-block length cross section Material cost per 1-block length cross section
Canal 2 Levee icon.png 24 Log icon.png
Platform Aqueduct (Levee floor) 3 Platform icon.png, 5 Levee icon.png 66 Log icon.png, 12 Plank icon.png
Overhang Aqueduct (Impermeable floor) ³⁄₆ Overhang 6x1 icon.png, 1 Impermeable Floor icon.png, 2 Levee icon.png 42 Log icon.png, 18 Plank icon.png, 7 Metal Block icon.png
Underground Pipe 1 Dynamite icon.png, 1 Platform icon.png, 1 Impermeable Floor icon.png 1 Explosive icon.png, 2 Log icon.png, 4 Plank icon.png, 1 Metal Block icon.png

Note: Does not include the cost of a pipe's entry and exit shafts. Values given are for a one-wide channel on a flat plain, with no additional height or depth. Taller, deeper, and wider channels require more materials.

Note to editors: Needed to be added: overground pipes and at-grade pipes.

Irrigating

Due to evaporation rates, using channels for irrigation is often not a practical option. If they are used, using three-wide channels results in the least amount of evaporation, but allows for marginally fewer blocks of workable ground per block of water than the six provided from both one and two-wide channels.

The most efficient way to irrigate an area in terms of both evaporation and workable ground is by using 3x3 ponds of water, filled by Water Dump icon.png Water Dumps, although this requires the employment of Workers icon.png Workers to maintain, and consumes a small portion of the supply of drinkable Water (Good) icon.png Water.

It is also possible to use high aqueducts feeding into sealed-off ponds if evaporation is not as much of a concern. Even though the canal evaporates quickly during drought, the pond lasts significantly longer, easily outlasting droughts and badtides without consuming stored water.